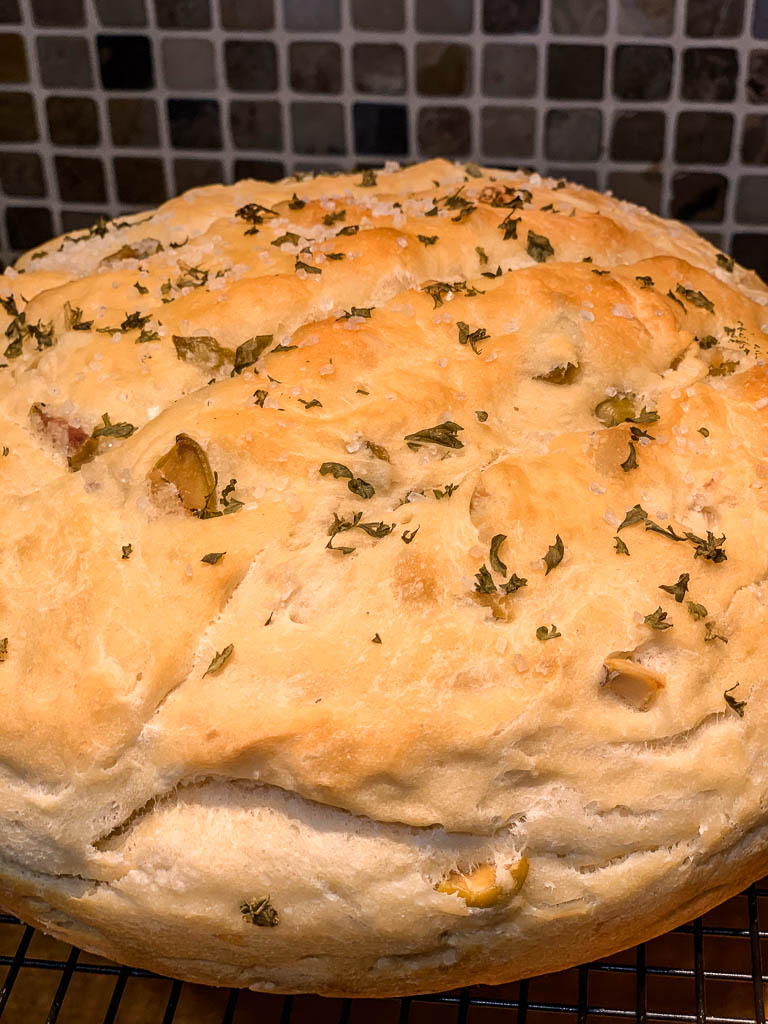
I needed to make some room in my freezer so decided to use my leftover Wheat Flour to make this delicious No-Knead Whole Wheat Skillet Bread.

So what’s so special about this bread recipe you may ask? Well for one it’s no knead. May not sound like a big deal but it sure saves on time!
My Latest Videos

While it is a time saver, this bread recipe does use yeast so you will need to let it rise & proof twice during the process. A total of about 2 hours.

What is Rising & Proofing
Rising is the process where carbon dioxide makes the dough rise and develop flavor. Put the dough in a lightly oiled bowl (olive oil or non-stick spray) and cover with a tea towel or plastic wrap. The dough should be left in a warm location until it has doubled in size.
Proofing basically means the last rise of the dough in its final shape (e.g. bun, loaf, etc.) before baking. Many factors come into play for how long it will take to prove the dough. You can tell when the dough is ready for baking when the dough springs back after you gently press the dough with your finger.

If you are fortunate enough to own a Danish Dough Hook (or Danish Dough Whisk) you can use that to mix the dough instead of a wooden spoon. You can get them on Amazon, not expensive, and it really does a great job getting the dough just perfect!

Recipe Tips
- Ideally the water should be between 105°F-110°F before adding the yeast. Water above 120°F will kill the yeast.
Instant Yeast vs Active Dry Yeast
Instant Yeast Does not need to be dissolved in water before use and can be mixed directly into the dry ingredients. On the other hand, Active Dry Yeast has to be dissolved in warm water with a bit of sugar before use to ensure it’s alive.
Does Yeast Go Bad?
Active Dry Yeast can go bad since it’s a living organism. It typically has a shelf life of 1–2 years when stored properly. To check if your yeast is still active, dissolve 1 teaspoon of sugar in ¼ cup of warm water. Add 1 packet of active dry yeast, stir, and wait for 5–10 minutes. If the mixture becomes frothy and bubbly, the yeast is still good. If not, it’s time to replace it.
Instant Yeast has a longer shelf life than active dry yeast but can still go bad. To test it, Dissolve ½ teaspoon of sugar in ¼ cup of warm water. Stir in 1 teaspoon of instant yeast. Wait 5-10 minutes. If the mixture foams and bubbles, the yeast is still active. If nothing happens, it’s time to replace it.

Gather your Ingredients
You will need the following ingredients to make this Whole Wheat No-Knead Skillet Bread recipe (see recipe card for quantities): Whole Wheat Flour, Kosher Salt, Active Dry Yeast, Water, Olive Oil, Old Fashioned Rolled Oats and Coarse Salt.
How to Make Whole Wheat Skillet Bread
- In a large bowl, whisk together the whole wheat flour, salt and yeast.
- Pour the warm water over the top and mix with a wooden spoon or Danish Dough Hook until combined.
- Lightly cover the bowl with a kitchen towel. Let the dough rise for 1 to 1 1/2 hours. The dough should’ve doubled in size.
- Lightly grease the bottom of a 10 to 12 inch cast iron skillet with some olive oil.
- With floured hands move the dough out of the bowl into the prepared skillet. Distribute the dough to shape it into a circle.
- Cover the dough with a kitchen towel and allow it to rise once more for about 30 minutes.
- Preheat the oven to 400°F.
- Brush the top of the dough with some olive oil. Score the top of the bread and sprinkle the rolled oats and the coarse salt over the top.
- Bake for 35 to 40 minutes until a crusty deep golden brown.
More Recipe Ideas

Whole Wheat No-Knead Skillet Bread
↑ Click stars to rate
Ingredients
- 4 Cups Whole Wheat Flour
- 1 ½ Tsp Kosher Salt
- 2 ¼ Tsp Active Dry Yeast
- 2 Cups Warm Water, 105°F-110°F
- 2 Tsp Olive Oil
- 1 Tbsp Old Fashioned Rolled Oats
- 1 Tbsp Coarse Salt
Instructions
- In a large bowl, whisk together the whole wheat flour, salt and yeast.
- Pour the warm water over the top and mix with a wooden spoon or Danish Dough Hook until combined.
- Lightly cover the bowl with a kitchen towel. Let the dough rise for 1 to 1 1/2 hours. The dough should've doubled in size.
- Lightly grease the bottom of a 10 to 12 inch cast-iron skillet with some olive oil.
- With floured hands move the dough out of the bowl into the prepared skillet. Distribute the dough to shape it into a circle.
- Cover the dough with a kitchen towel and allow it to rise once more for about 30 minutes.
- Preheat the oven to 400°F.
- Brush the top of the dough with some olive oil. Score the top of the bread and sprinkle the rolled oats and the coarse salt over the top.
- Bake for 35 to 40 minutes until a crusty deep golden brown.


This recipe is one that I love to make, especially if I am in a hurry. Very tasty.